How would you like to make more course sales? And what if I told you that online course platform Teachable has a built-in tool that can make the process I’m about to teach you easy?
If you’re not a Teachable user, don’t click away! There’s something here for you, too. This post comes to you in two parts: First, I’ll walk you through an important sales concept that applies to anyone selling products. Then I’ll show you how Teachable makes it easy to put that concept into action.
Table of Contents
- Segmentation for Sales Pages
- How to Make Segmented Sales Pages in Teachable
- Want More Teachable Tutorials? We’ve Got ‘Em!
Segmentation for Sales Pages
To get started, I want to show you a feature inside of Teachable’s course builder. I’m logged into the admin panel and looking at the Pages section for our newest course, Heroic Online Courses.
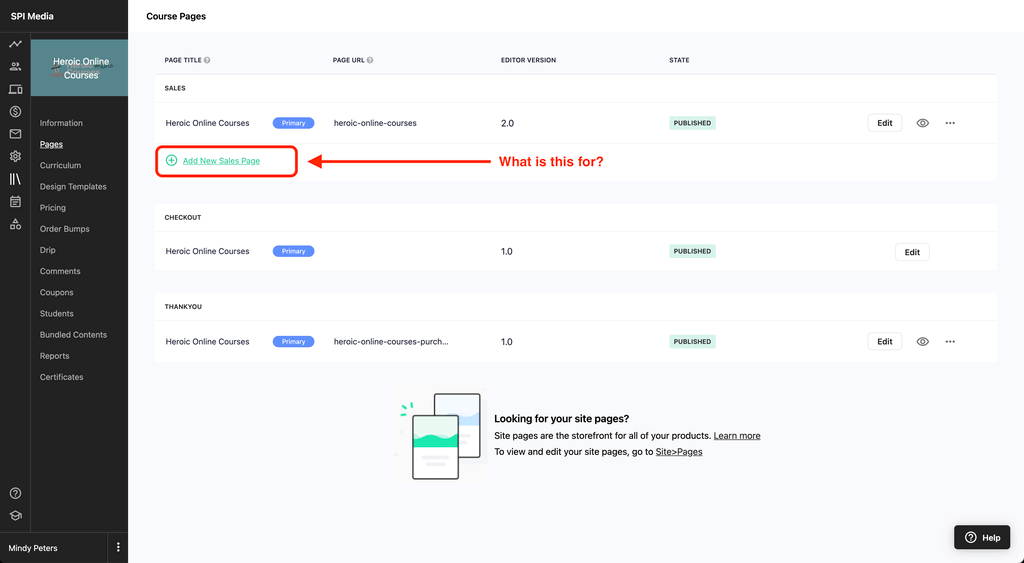
Look at that—in the section where you build your sales page, you have the option to create more than one sales page for your course.
But why would you need more than one sales page for your course?
Because creating multiple sales pages for a product unlocks the power of segmentation.
What Is Segmentation?
If you’ve been around SPI for a while, you’ve likely heard us talk about email segmentation. It’s a topic we’ve covered extensively. With email segmentation, you keep track of the things you know about your audience and adjust some of the email content you send based on that knowledge.
When you first get started with segmentation, that information is usually going to be a simple binary: either they have bought something from you or they haven’t; or they’ve downloaded a specific lead magnet from you or they haven’t.
As you progress, you might start to get more complicated. For example, we ask the question, “Do you have a podcast?” and offer three answers:
- Yes, I have a podcast [our “podcaster” group]
- No, but I want to start a podcast soon [our “interested” group]
- No, and I don’t want to start a podcast [our “not interested” group]
Once you start collecting information on your audience, you can start customizing the emails you send based on that information.
Here’s an example of what that looks like.
Before starting with segmentation, if we wanted to announce an upcoming webinar on the topic of starting a podcast, we would email that announcement to everyone—regardless of their interest in the topic.
But now, we know to only send that announcement to the interested group (as well as to subscribers who have not answered the question yet). The webinar is too basic for the podcaster group and it’s not of interest (and probably bothersome) to the not interested group.
That’s segmentation.
How Does Segmentation Apply to Sales Pages?
As you get good at using email segmentation, you build up the habit of talking differently about your product to your different segments. You’re selling the same product, but you emphasize the features that are most relevant to each specific group.
For example, we just launched our Heroic Online Courses course. This course would be great for both:
- people who have never created a course, and
- people who have created courses but found the process difficult.
We want to sell the same product, but we could use different email copy when we’re promoting the course to these two groups.
For the group that has never created a course, we may first need to spend a significant portion of the email convincing them why a course is a good business asset. Then we can talk about how our product makes the process easy.
For the group that has struggled with course creation, we’ll want to focus the email copy on how our product addresses those struggles and makes the process easier.
And at the bottom of both emails, we’ll link to a sales page. Wouldn’t it be great if the sales page the reader landed on matched the focus of the emails?
Enter custom sales pages.
When you can create multiple sales pages for a single product, you unlock the ability to speak directly to the needs your sub-audiences have.
Why bother? Because people are more likely to buy when a sales page speaks directly to their experiences and struggles. You’ll convert more sales than if you just sent everyone to a general sales page.
With segmentation, you can customize anything you want. You can swap out videos and testimonials to better fit your sub-audience. You can even throw in bonuses or adjust pricing, adding coupon codes or changing to a different pricing plan to give discounts to valued customers, or to people who are sitting on the fence.
Here’s a walkthrough of this explanation (first 5:50 of the video below):
Okay, but this sounds like a lot of work.
It all depends on your sales platform. Some, like Teachable, make it easy to create custom sales pages. Other platforms can be more restrictive and require you to get creative.
How to Make Segmented Sales Pages in Teachable
Now that we’ve covered the concept, I’ll walk you through three ways you can use custom sales pages in Teachable specifically. I’ll give you beginner, intermediate, and advanced examples, with screenshots and a video walkthrough for each one.
Beginner: Make a Copy and Tweak the Content
This process is incredibly simple, once you’ve created your primary sales page. First, we’ll make a copy of your primary sales page.
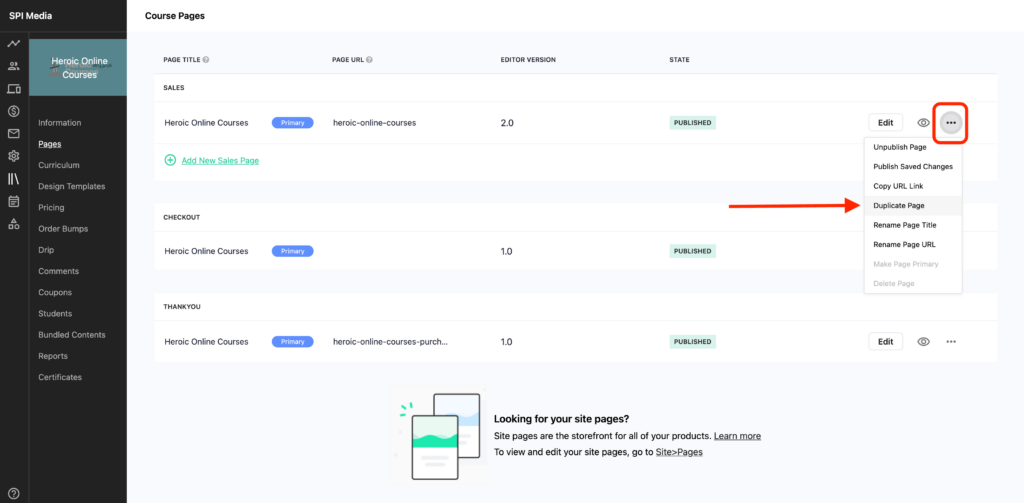
- Log into your Teachable admin panel and find your course.
- In the left-hand sidebar, click on Pages.
- In the Sales section, find your primary sales page. Click on the […] button on the right.
- Select Duplicate Page.
Teachable will make a copy of your existing sales page. Click the Edit button.
Now you have a second copy of your sales page that you can edit. Before you start tweaking the copy, ask yourself a few questions about this segment of your audience:
- How are they different from your audience as a whole? What makes them special?
- What specific needs or desires do they have, or what do they understand better than the larger audience?
- What specific goals are they hoping to accomplish by buying this product?
- Do you want to offer them a different pricing plan or include a coupon on the page?
Let’s go back to the example of selling Heroic Online Courses. Here are my answers for the segment of audience members who have already created an online course before:
- They have already taken action on the idea to create an online course before. They should be applauded for this! They understand that courses are a great way to serve the audience.
- They understand that creating a course can be tough, especially the process of staying on track. We may want to emphasize the third and fourth modules of the course, more than the first and second.
- They are looking to make the process easier than it was the first time they created a course.
- No special pricing plan for this occasion.
With this list in mind, now you can go through your sales page and start tweaking the copy to address your segment’s specific needs. Maybe you’ll swap out a few testimonials or adjust the headline copy.
In this video segment, I walk you through this entire process (from 5:50 to 11:26 in the video):
Here’s an example from the video (with a made-up statistic) of editing a sales page headline to speak to SPI Pro members:
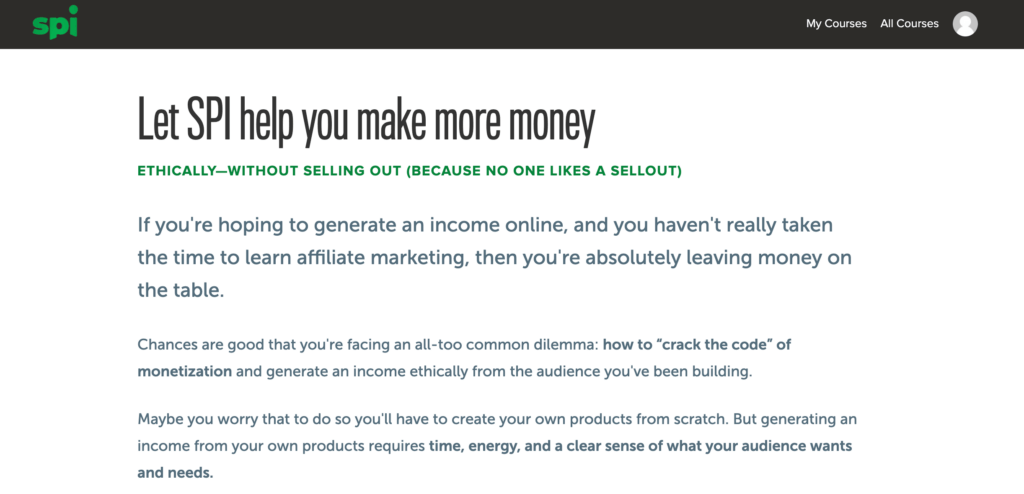
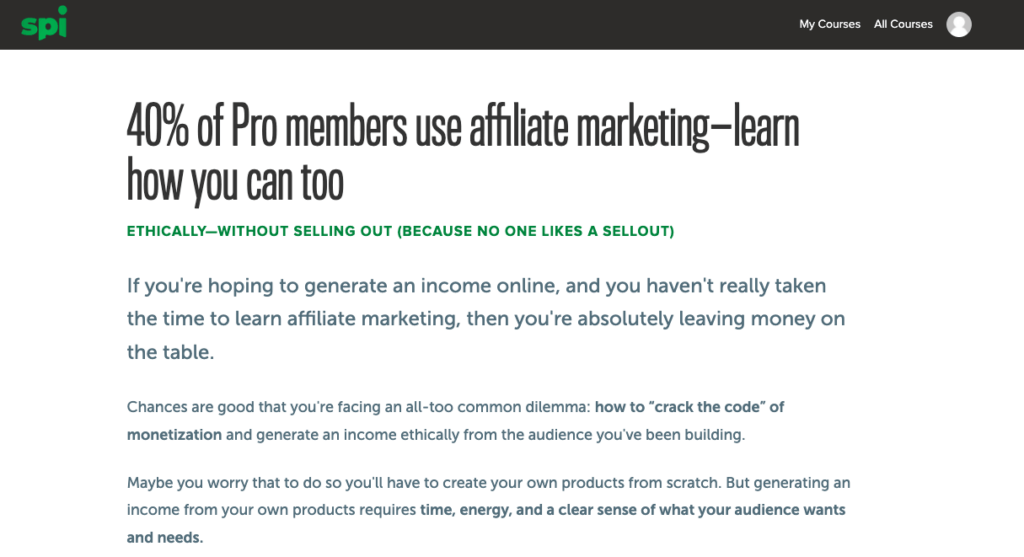
Once you’re done, you’ll publish the page with a slightly edited URL. This page is not linked to the main page of your Teachable site the way your primary sales page is. It’s essentially a hidden secret page, and the only people who will find it are those you link directly to it.
Use the hidden page URL for emails sent to that segment. Or, if you made the page for a specific community within your audience (as I did in the video example), you can share that link in your community.
Intermediate: Make a Page for Your Best Affiliate
If you’re using Teachable’s affiliate program, chances are you’ve got a couple of affiliates who are way outperforming the others. With affiliate programs, it always seems to be the case that a few people dedicate themselves—so let’s do something special for those affiliates.
Let’s make them a custom sales page of their own. Read below, or watch this clip from the video (11:27 to 15:33):
Initially, the steps are exactly the same as our beginner example. Make a copy of the page, and then start tweaking the copy and examples. In this case, you might want to have a short conversation with your affiliate to gather the following information:
- Do they use a name for their audience? For example, Pat often refers to the SPI audience as Team Flynn and uses the hashtag #TeamFlynnForTheWin.
- Can they offer a testimonial for the product? A video testimonial in particular is a great asset to have, because you can use the video directly, or write out quotes from inside the video.
- Is there a particular benefit to the course that they promote directly?
Once you have this feedback, you can start incorporating these elements into your sales page. Greet the visitors to the page using either the audience name or some variation of “Welcome, friends of [affiliate]!” “Welcome, [affiliate’s podcast] listeners!” Here’s an example for the fictional Mindycast podcast:
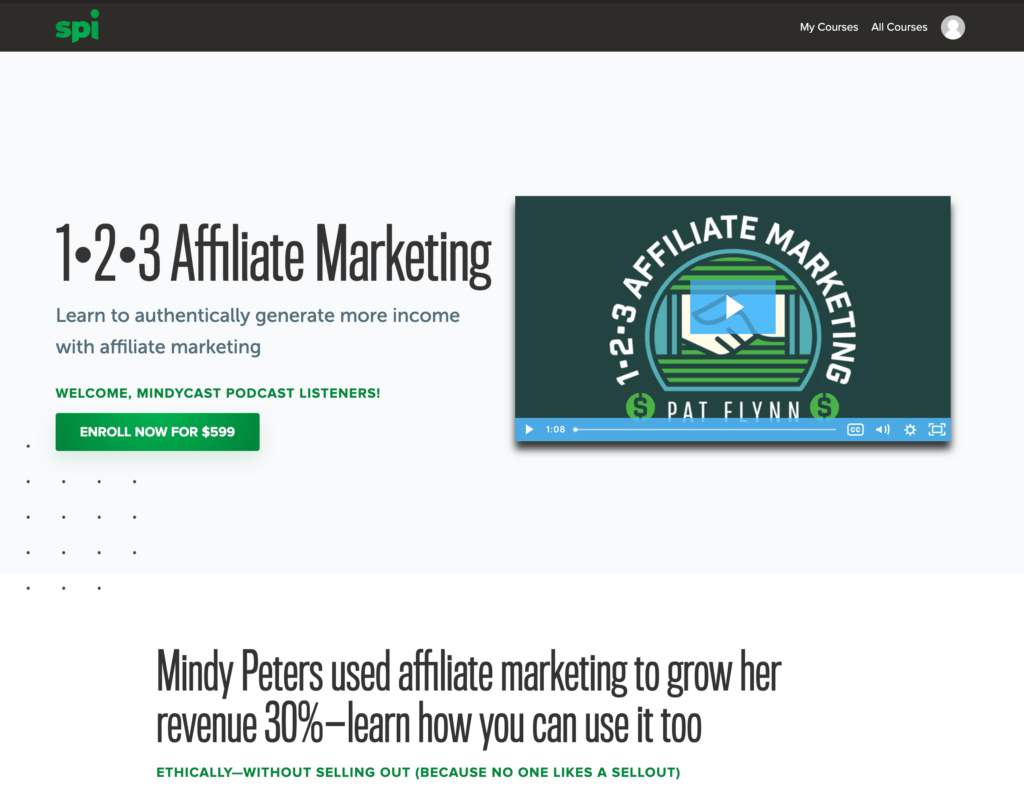
When you’re done editing, publish the page, and then we’ll move on to the one technical portion of this level: adding the affiliate link to the URL. Here’s what to do:
- Now that the sales page has been published, click to open that page.
- In a separate browser tab, go to the Users section of Teachable and click on Affiliates.
- Search for and find that affiliate. Click to open their record.
- In the left-hand sidebar, click on Affiliate.
- At the top, you’ll see their affiliate code and their general affiliate link. Click to load the affiliate link.
- This will take you to the main landing page for your affiliate.
- Look at the URL, which should look something like this:
https://courses.smartpassiveincome.com/?affcode=30425_obxkbt5j
Copy everything from the ? onward: ?affcode=30425_obxkbt5j - Paste that at the end of your new sales page URL.
Your new sales page now includes affiliate tracking for your affiliate. Send them this new URL (including the affcode= on the end of the URL) and instruct them to use that for promoting your product. Any purchases made through this URL will get credited to this specific affiliate.
Advanced: Make a Hidden Promotion Page for a Temporary Sale
Custom pages can also be used for secret promotions that you share only with select audiences. I’m rating this as an advanced strategy because the way that I’ll show you how to do it requires an additional tool: Deadline Funnel.
Deadline Funnel will allow you to set up the parameters around your sale, and then when the sale ends, automatically redirect traffic back to your main sales page. Essentially, it closes the sale for you automatically.
At SPI, we use this feature for two types of sales; holiday sales, where everyone has the same deadline; and evergreen sales, where each person gets a separate deadline.
For these purposes, I’ll show you how to set up a holiday sale. We use this most often to run a course promotion for one week following a webinar.
Read below, or watch this clip from the video (starting at 15:34 in the video):
With a holiday sale, during the promotional period, you send everyone to a custom sales page, such as:
https://courses.smartpassiveincome.com/p/123-affiliate-marketing-short
Note the “-short” added to the end of the URL. When the promotion ends, you set up Deadline Funnel to send all traffic back to your main sales page:
https://courses.smartpassiveincome.com/p/123-affiliate-marketing
After the sale has ended, anyone who tries to go directly to the promotional page gets set automatically to your main sales page.
In brief, this is the process:
- Make a copy of your sales page.
- Customize the page with your promotional pricing plan or add in a coupon code, and to speak about the expiring promotion.
- Set up the Deadline Funnel promotion.
- Add Deadline Funnel code to your sales page.
Here is a full walkthrough of the process, showing you how to configure Deadline Funnel:
Deadline Funnel also makes it easy to put countdown timers on your sales page, so that visitors to the page have a sense of urgency around the sale.
Now, you could do this without Deadline Funnel, and just unpublish your hidden custom page when the sale ends, but when you do that, you’re not able to control where visitors end up. Teachable’s default, if someone looks for a page that doesn’t exist, is to send them to your main landing page.
So for the example above, when the sale ends, instead of landing on this page:
https://courses.smartpassiveincome.com/p/123-affiliate-marketing
They’ll land on this page:
https://courses.smartpassiveincome.com/
Also, if you’re doing this without a tool like Deadline Funnel, you’ll need to manually unpublish the promotional page at the end of your Deadline. You absolutely can do this—for years, I woke up at 2 AM to close out our sales—but after a while (and a few times oversleeping), it gets tedious.
Want More Teachable Tutorials? We’ve Got ‘Em!
I hope this gives you inspiration for how you can use segmentation to increase your course sales! You’ll find more tutorials like this over on the Smart Passive Income Team YouTube channel.
And if you want to give Teachable a try to host your next online course, use our affiliate link to get a premium course creation bundle worth $866.

